
Zignyl helps you to manage tasks that have to be completed at your locations on a daily, weekly or monthly basis. Tasks show up on your Location Dashboard (Zignyl Clipboard) so that employees can see what needs to be done. Please keep in mind that creating, editing, removing, and previewing tasks are currently available Area Directors and Company Admins only.
In this article you will learn:
-
How to make and add task categories.
-
How to create and manage task groups.
-
How to create, assign and manage location tasks.
-
How to create and manage user tasks.
-
How to access Task reports.
Task Categories
To enter the Task dashboard, use the Tasks modal listed on the side column, or click this link.

-
Click on Manage Task Categories. Here you will see the various Task Categories that have been entered for your location. If there are not any listed, your Area Director may need to enter or have zignyl enter them. The categories will look similar to this:

-
Click on the Add Category button. This will take you to the Add Task Category screen. Here you can provide a name and description for the category. You can also edit or delete task categories by clicking on the pencil or trash icons.


Create And Manage Task Groups
Task groups are used to separate large groups of tasks on your Zignyl Clipboard. Tasks groups work best to organize task lists that are specific to different areas of your store. This is especially helpful to keep track of who needs to do tasks and for stores with multiple brands operating in the same space.
-
Click on the Manage Task Groups button. If there are no groups already added, you can do so here. You can click on Add Group to enter a group. You can also edit or delete existing groups by clicking on the pencil or trash icons.


Create, Assign And Manage Location Tasks
Location tasks happen within a store location. They are displayed on the location dashboard.
-
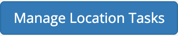
To start creating tasks, click on the Manage Location Tasks button.
-
Here you will see the Location Tasks. Choose the location that you want to see the tasks for from the drop down. You can add by clicking on the Add Location Task button. Also you are able to edit or delete existing tasks by clicking on the pencil or trash icons. Remember that managers do not have access to task creation/editing, and must work with their Area Director or Company Admin. For more on roles and permissions, see this article.

-
By clicking on the Add Location Task, a pop up screen will appear. You can do the following (the yellow numbers correspond with the numbered definitions of the tasks):


-
Title. Enter the title of the task
-
Description. Enter the description of the task. If this is a HAACP task, there will be specific requirements. If this is an internal task, a short description is best.
-
Attach File. Here a file or pdf can be attached that explains the steps of the task set out by the franchise.
-
Include Note, Require PIN. Clicking these boxes are necessary for tasks that require notes, such as temperatures, as well as the PIN identification of the person that completes the task.
-
Location. The location that the task is to be assigned to can be chosen from the drop down.
-
Category and Group. The category and group that the task is assigned can be chosen from the drop downs.
-
Subtasks. By clicking on the (+) sign you can add Subtasks to the main task. This is especially helpful when a main task has several duties associated with it. For example, Pre Closing has subtasks such as Fill mop bucket, Clean Refrigerator, Sweep/mop, etc.
-
Set Timing By. You can choose to set timing by Date/Time or by Store Hours. When setting, you can choose the start time to be a certain amount of minutes before or after the store opens or closes or you can set by a specific Date/Time. You can then set the Past due as well as the tasks recurrence and frequency.
-
Long Term or Task is Active. To ensure that the task shows up on your location dashboard, you must check mark that the Task is Active. If it is a Long Term task, this also must be checked.
-
Notify if Late or Incomplete. You can choose from the drop down the name of the person that needs to be alerted to the tasks not being completed or if late.
-
When completed, be sure to click on the blue SAVE button.
Create, Assign And Manage User Tasks
User Tasks function similarly to a to-do list and are designed for management responsibilities such as "Put in a Truck Order", "File Papers & Organize Desk" or "Order Coupons". These tasks show up on the assigned user's personal dashboard and help keep track of responsibilities.
-
Click the Manage User Tasks button on the Tasks index.
-
Click Add User Task.
-
Task Title: Enter the name of the duty (e.g., "Submit Payroll").
-
Assigned To: Select the specific user (e.g., General Manager or Assistant Manager) responsible for this task.
-
Set the Category, Start Time, and Recurrence just like a location task.
-
Click Save.
Preview Tasks Report
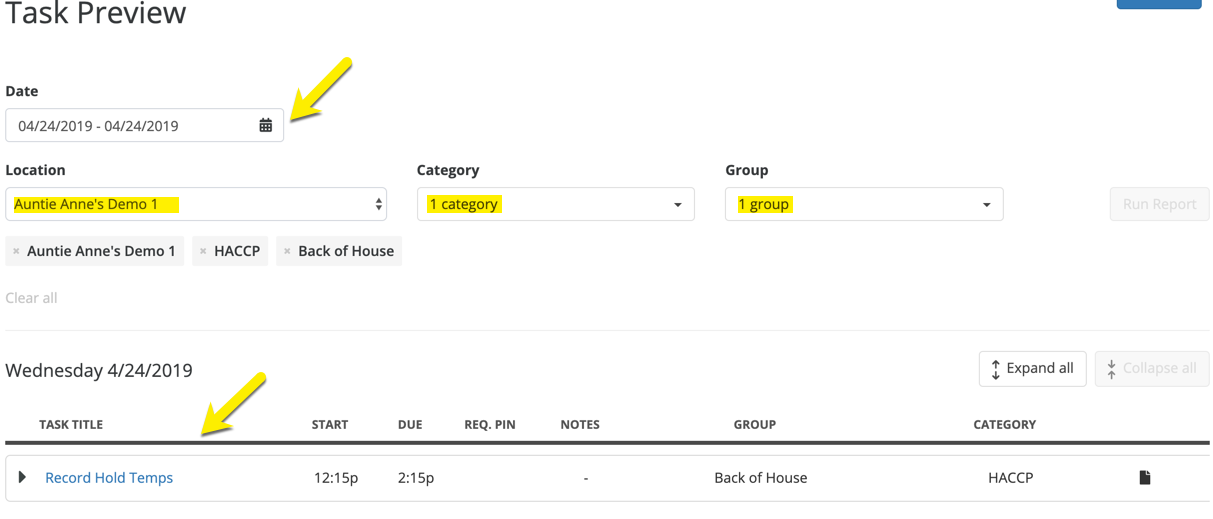
The Task Preview Report displays every task, in time order, that appears over a given time period. This report is designed to make it easy to rearrange and edit tasks. This report allows for you to see what order tasks appear in, how long each task has to be completed, and the descriptions and attachments that are connected to each task.
-
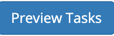
Click on the Preview Task button.
-
Choose a date range, then a location, category and group from the drop downs. Then click on the Run Report button.


Task Completion Report
The Task Completion Report is your primary compliance tool. It displays whether tasks have been completed on time, completed late, or left incomplete for a specific date range.
-
Navigate to Reports in the main menu and select Task Completion Report.
-
Date: Select a date range to include in report.
-
Location: Select your store.
-
Category & Group: Select what you would like to see in the report (e.g., choose only "HACCP" and "Closing").
-
Click Run Report (or wait for the auto-refresh).
Understanding the Dashboard: The report gives you a visual breakdown:
-
Green: Completed on time.
-
Yellow: Completed late.
-
Red: Incomplete.
-
Gray: Pending.